Developing E6 Slide Film at Home
This is actually a very old (2007!) guide which I wrote for an older website that I keep updated even less diligently than this one. I’m moving the content over to this site so that it’s not lost forever (this guide is one of very few resources on the subject of home colour film development.)
This is a short guide written to explain how to develop CR46 or E6 colour slide film yourself ‘in the kitchen.’ Commercial slide processing is not only hard to find these days (most high street photo shops will have to send it away if they handle it at all,) but also expensive.
By processing yourself, you can save considerable money, as well as having the immense satisfaction of knowing the whole process, from taking the photograph to projecting (or scanning) the slide, was in your control.
However, there is a myth that E6 (or colour processing in general) is ’too hard’ to DIY. I hope this guide demonstrates that isn’t true; it may be slightly more tricky than B&W in some respects, but equally in some ways it is easier.
Who is this for?⌗
I had a little difficulty ‘pitching’ this at the right level. On the one hand, there are many, many guides to black & white processing on the Internet, far better written than anything I can put together. Equally, I didn’t want to completely leave out the basics.
So, with that said, experienced black & white home-developers will probably be able to skip much of this. If you’ve never processed any kind of film before though, I hope this will give you a general overview of the process - but I would strongly recommend you start first with black & white processing before you start E6.
Of course, you’re welcome to ignore that advice. Fortune favours the brave, and B&W experience certainly isn’t required. You will find the inevitable mistakes you make are a lot cheaper with B&W though!
Oh, one other thing - I’m dealing with 35mm (‘135’) film here. If you shoot a different format, the general principles are the same, but there will be differences in the detail!
What you need to start⌗
Developing Equipment⌗
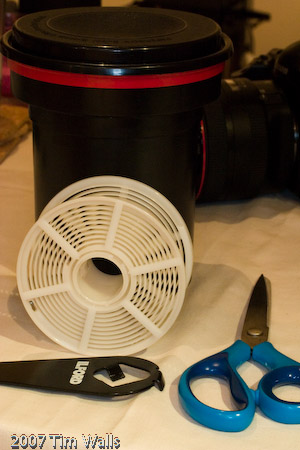
If you already process black & white, you will already have most of the equipment you need; it’s worth checking all of it will be suitable for colour work, however. The basic bits are:
| Item | Notes |
|---|---|
| Developing Tank & Reel | The developing tank is a light-proof tank with a spout allowing you to pour chemicals into/out of the tank. This means you can do most of the developing in daylight. The film reel - which may come with the tank or can be bought separately - is a spiral onto which the film to be developed is loaded. The film is put on the spiral in complete darkness, and then placed in the tank. Once the lid of the tank is sealed, you can work in daylight. |
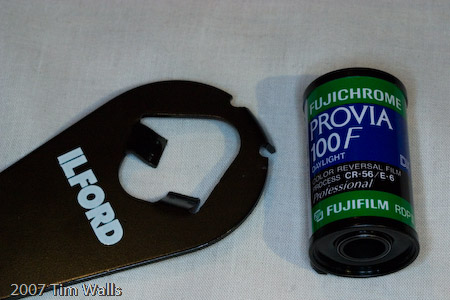
| Can Opener | To remove the lid from the can of film. You can buy specialist photographic can openers (shown in the picture,) or an ordinary ‘crown top’ bottle opener may do the trick. |
| Scissors | These are self explanatory I hope! |
| Timer/Stopwatch | Timing is critical - you’ll need to be able to measure how long the film has been in the various chemicals, with an accuracy of about a second. I use the stopwatch on my mobile phone; any stopwatch or clock where you can clearly count seconds will do. |
| Darkness | You will need somewhere completely dark to load the exposed film into the developing tank. This can either be a ‘darkroom’ (any room where you can completely block any light,) or you can use a changing bag. This is a black bag (usually double-lined) into which you can put the developing tank and film. The bag (double) zips up, and you put your hands into the bag through two elasticated ‘armholes.’ |
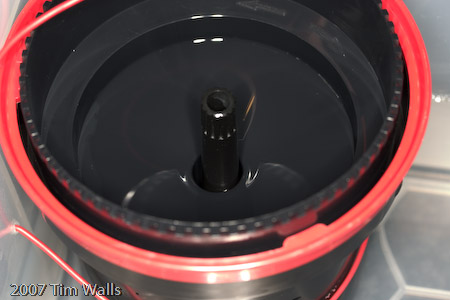
Important note on Tanks/Reels. Not all tanks are suitable for colour work. Stainless Steel tanks are considered ideal, because the metal conducts heat well and so makes it easier to regulate the temperature of development. It is possible to use a plastic tank and spiral (I do) however, with one important caveat: Certain types of plastic can absorb permanently the colour developer chemicals. This means when you develop the next roll of film, the first developer will be contaminated, leading to incorrect film development. Check with your tank manufacturer - Paterson Super System 4 tanks are made with plastics/resins which resist the colour chemistry, and are suitable.
Temperature Control⌗
The biggest difference between black & white and colour development is that temperature is critical for colour development. Developing at incorrect temperatures will lead to colour casts on your developed slides.
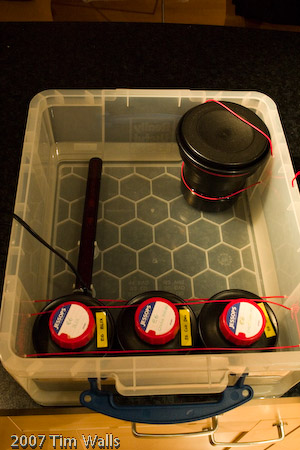
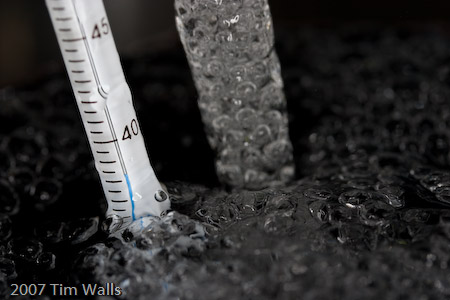
Temperature control needn’t be too hard, however. The easiest way to control temperature is to immerse your chemicals and developing equipment in a bath of water at the required temperature (38 Celsius for E6.) I use a large plastic storage tub which you can get from any stationery or homeware supplier.
Bitter experience has taught me that your bottles and developing tank will float around in the tank if not secured! So, I cut small holes in the side of the tank and ran lengths of wire along the tank to create ‘swimming lanes’ which stop the chemistry bottles floating away (or more importantly, tipping over.) A similar arrangement of wires in one corner holds down the developing tank.
The last question is ‘how do I keep the water in the tank at the right temperature’? I use a submerged water heater bought from Nova Darkroom; this is a thermostatically controlled heater similar to an aquarium heater. In fact, you may find you can use a suitable aquarium heater - provided it can be set to the right temperature. As a last resort, you can try to get the temperature right by pouring hot and cold water into the tank until you reach the right temperature, and then maintain the temperature by topping up with warm water as necessary.
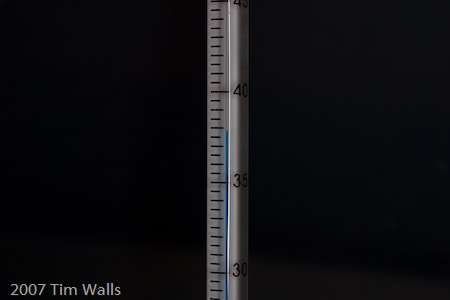
Oh, and of course, you’ll need a thermometer! If you have a black & white development thermometer, it probably won’t be suitable - you’ll need a thermometer which clearly shows 38 Celsius and allows you to keep the temperature accurate to +/- half a Celsius.
Chemistry⌗
All this is irrelevant with colour. The process is fixed, and all the chemicals are matched. You will therefore be able to buy a kit containing all the chemicals you need (except water) in one box.
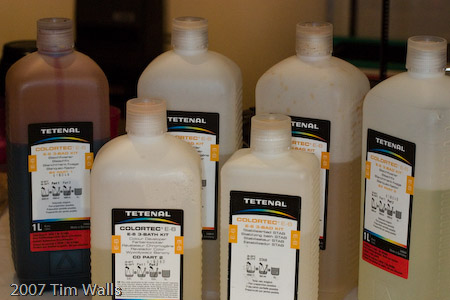
The kit I use (pictured) is from Tetenal. This is a ‘3 bath’ kit. The E6 process normally requires six chemical baths; however, some of these steps can be combined into a single bath. The most obvious example is bleach/fix - instead of a separate bleach followed by fix, the 3-bath version of E6 uses a single bath in ‘BLIX’ - combined bleach & fix.
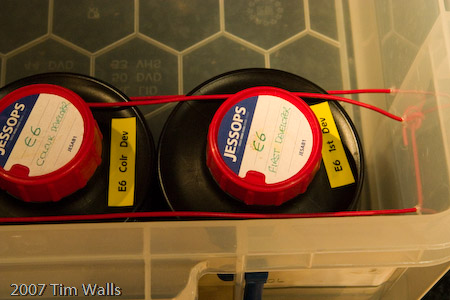
The chemicals in the kit will mix to make 3 working solutions - First Developer, Colour Developer, and BLIX. In addition, some kits (Tetenal’s included) will also come with a final ‘Stabilizer’ bath; as far as I can tell (!), this is a combination of hypo clearing agent and rinse-aid, which allows you to shorten the final wash. It’s probably optional, but if your kit comes with it you should use it!
You will need 4 suitable bottles for storing your working solutions of chemicals - first developer, colour developer, BLIX, and the stabilizer. Make sure you label the bottles and the lids clearly - the first developer can be contaminated by so much as a sniff (let alone a drop) of the colour developer; you don’t want to accidentally swap bottle tops.
Washing⌗
I wash the tank out using running water. I have no special equipment for this, just a normal kitchen mixer tap. It’s possible with a little practice to get the temperature of water from my tap to be exactly 38 C extremely consistently. There is a ban on flushing toilets or using the washing machine when I’m doing so, however - a sudden use of water somewhere else in the house can cause the temperature of water from the tap to dramatically change! Also, I make sure I have the water running for at least a couple of minutes before I need it, to ensure the temperature has stabilised.
If you’re not lucky enough to have a mixer tap which is so good to you, you can instead prepare a jug of water at the appropriate temperature (if you put the jug in your controlled water bath, you can keep it that way,) and rinse with that water. You’ll want to make sure you have enough to change the water in the tank at least a couple of times with each rinse, and you may wish to extend the time you rinse for.
Developing the Film⌗
Step 1: Be Prepared⌗
Fill your water bath - if you’re using a heater turn it on, otherwise you will need to ensure you fill it with water at 38 C and maintain that temperature by topping up with warm water as required. Place the working solution bottles into the water to warm up with the water.
Ensure you have everything else you need to hand - film, developing tank and spiral, scissors, can opener, and a dark place - either a darkroom or a changing bag.
One other thing you may find useful to have is a towel! With lots of water sloshing around, you’re bound to spill some, so it’s handy to have something to wipe it up.
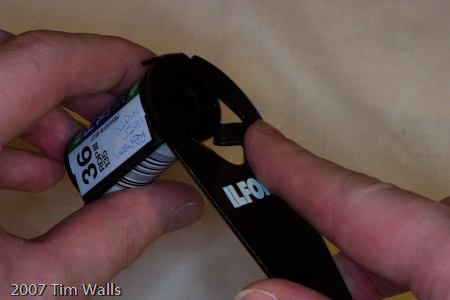
Step 2: Load the Film into the Tank⌗
These steps must be performed in complete darkness. Either use a changing bag, or a completely light-safe room.
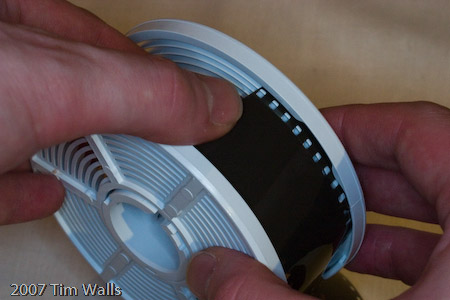
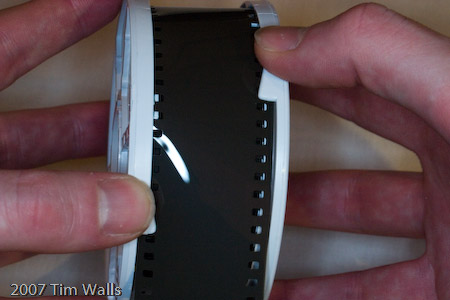
Now place the spiral into the developing tank, place the lid/funnel onto the tank, and secure it according to the manufacturers instructions (Paterson tanks secure the lid by twisting it clockwise until it clicks.)
You can now turn on the lights! Or, if you are using a changing bag, take the tank out of the bag.
Place the tank into the water bath, and secure it appropriately to stop it floating around or tipping over.
Step 3: Be Patient⌗
Step 4: Start Developing!⌗
Continue to agitate the first developer according to the instructions - with the Tetenal kit, that means one agitation every 15 seconds. Take a note of the length of time you need to develop for - again, check the chemistry kit instructions; the Tetenal first developer specifies 6 minutes.
Just before the first developer time is up, pour the developer out of the tank and back into the bottle.
At exactly the first developer time (e.g. 6 minutes) start to wash; either pour water at the appropriate temperature into the tank and agitate thoroughly, or place the entire tank under running water of the correct temperature. You will need to wash for around 2 and a half minutes or more.
Repeat this process, for the colour developer (another 6 minutes, followed by 2 and a half minutes wash) and then BLIX (6 minutes, followed by 4 minutes wash, or longer if you do not use stabiliser.)
Finally, rinse the film for a minute using the stabiliser solution (if provided.) It is safe to remove the light-tight funnel from the developing tank at this point.
Step 5: Dry your Film⌗
Hang the film to dry in an appropriate dust-free place! You can use specialist film clips to hang the film, or at a push use bulldog clips or even clothespegs. It will be helpful to hang a small weight from the bottom end of the film to ensure it dries straight (dedicated film drying clips typically come as a pair, with one of the pair of clips weighted for this purpose.)

That’s all folks⌗
And that, as they say, is that. It’s a lot simpler to do it than to write about it, so I recommend you have a go. Pulling the developed roll off the reel is incredibly satisfying - and it helps that you’re saving money as well!